Thursday, August 30, 2012

Save (and Use!) your Scraps

Crafting on a Budget Tip #4

One thing that many of the most dedicated crafters do is that they save their scraps. When I started my first scrapbook, I decided that I would save all of my scraps. I used three different sized plastic bags and separated my extra paper according to size. But, guess what: a year later I still had all of the same scraps. I hadn't saved any money yet!

So, just a few weeks ago I went through all of my scrap paper again. I threw away a lot of it and only kept scraps that were actually big enough to use. Then, I used some of the scraps! I need to do the same with the scrap fabric that I have around here.

Maybe it seems ridiculous that I would go so long without using a single scrap, but I get so excited to use my new paper that it doesn't even occur to me to check the scrap bag. Really, it is only worth saving your scraps if you make a point to pull them back out and use them in projects. Maybe make up a filing system so you don't have to go through every single scrap to see if you have one in a certain color. Whatever you do, make sure that you use those pieces of paper, ribbons, fabric, and other supplies!

Tuesday, August 28, 2012

Focal Point

Card Making Basics Tip #3

A card is more visually pleasing if there is a specific focal point.

The concept of having a focal point can relate to color, placement, size, and shape of the elements that you use in a card. For example, for Independence Day I made a card (I admit that it isn't my best card, but it is a good illustration of this point) using muted colors. I wanted it to be simple so I chose to place a big blue star in the center of the card; after I assembled everything, the card was totally boring. It just didn't look good.

I put the card aside for a day and when I came back to it, I realized that it lacked a focal point. The size of the star wasn't enough to make the card look "finished." When I added white lettering and brads, the card looked a lot better:


Monday, August 27, 2012

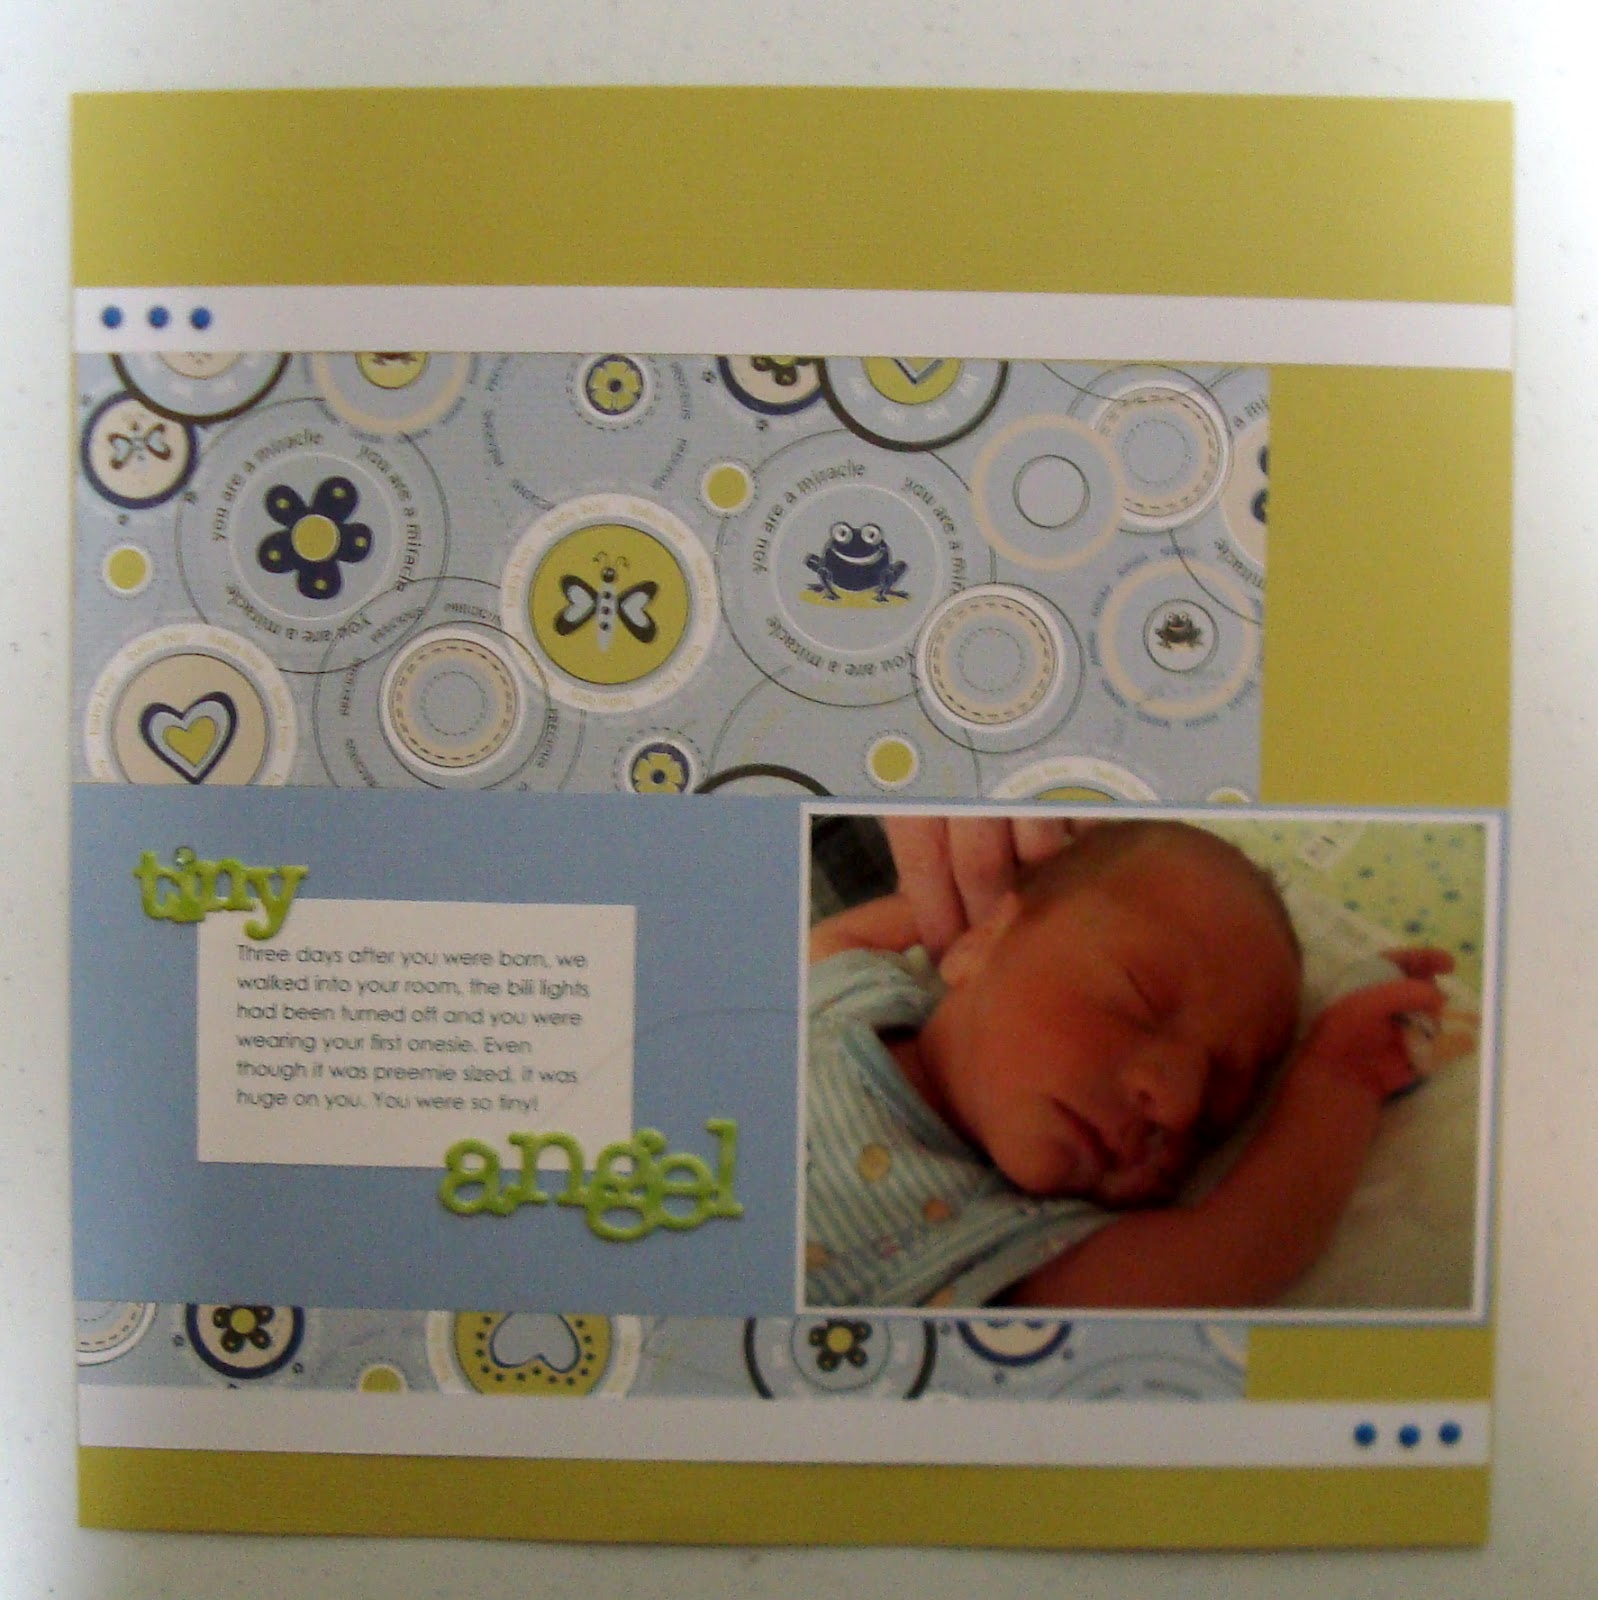
Tiny Angel Page

Last night, I decided to work on Connor's baby book. I have a lot of really cute baby boy paper that I am so excited to use. Here is the finished result:


Supply list:
  • Cloud9Design baby boy paper, coordinating green and blue cardstock
  • blue brads from Paper Studio
  • "tiny angel" word stickers by Momenta


Monday, August 20, 2012

Anni-verve-sary Challenge #5

I just finished the fifth and final challenge for the Anni-VERVE-sary. It took me a while to come up with a good idea for this one because it had to be something other than a card.


After thinking about it for a long time and going to several different websites for ideas, I decided that I wanted to make a pinwheel and I wanted to make a gift for my husband. Eventually, I came up with the idea of making a jar full of some of my favorite memories that we have together. 


I decorated the jar and typed up the first 20 memories that came to mind. It was fun to think about all of those good times that we have had together. I hope he has as much fun reading them as I had while I was writing them!


Supply List:
  • empty marshmallow cream jar
  • Paper: Scrapbook Walls "guest diamonds" paper with coordinating blue and green cardstock
  • Paper Studio Bubble-A-Bilities letters (C&J) and words (Memories)
  • metallic brads from Paper Studio


Saturday, August 18, 2012

Anni-verve-sary Challenge #4

So, here is challenge #4:


Seems like a *simple* challenge, right? So, it probably looks like I threw this card together in about 5 minutes, but it actually took me over an hour to compare different colors, select the perfect piece of paper, choose my font, and decide on the right design. The only easy part was choosing my dry embossing folder. Of course I used the one that I just bought with a birthday gift card from my mom! Incidentally, she also gave me my Sizzix dry embossing machine when she got her new Big Shot. Now those are the kind of hand-me-downs that I like!


So, without further ado, here is the card that I made for this challenge:


Supply List:


Friday, August 17, 2012

Anni-verve-sary Challenge #3

Luckily, my baby boy is taking pretty long naps today so I have had time to do the third challenge for Anni-verve-sary. This time, they gave us a layout to work with:


As I am doing these challenges, I realize that I really prefer to use a pre-designed layout than have to come up with one on my own. Maybe that is a testament to my lack of creativity, but I am okay with that. I really like how this card turned out. 


Supply List
  • Paper: Paper studio tiny stripe navy/cream, Paper Studio quatrefoil navy/cream, Echo Park yello flourish, navy and gray cardstock
  • Accessories: navy ribbon, Mosaic stickers by Mark Richards
  • "Thinking of" Century Gothic font (Microsoft Word) "You" French script


Anni-verve-sary Challenge #2

Here is my big confession: I don't own a single stamp... or an ink pad, distressing tool and probably half of the other cool and useful tools that other card makers have. I would love to try them out, but right now my husband and I are saving up for our first house, so buying lots of scrapbooking supplies just isn't in the budget. I would love to try the Verve stamp collection that I keep reading about on all of these card making blogs that I follow, which is one reason that I am doing the Anni-VERVE-sary 2012 challenges. Of course the other reason is that I think it is fun.

This is the challenge:

I was excited to do something with silver brads and paper. Here is what I came up with:


Supply List

Paper: DCWV silver script paper, black, white, silver cardstock
Accessories: thin white ribbon and silver brads

I printed "Happy Anniversary" from Word with the Vladimir Script font.

You can look at the gallery with all of the Anni-VERVE-sary Challenge 2 entries here.